Note: Google was modernizing OAuth interactions in Native Apps for Better Usability and Security,
which means, this solution to receive an access token via webview unfortunately does not work anymore starting from April 20, 2017.
Currently there is no workaround available... Someone will have to write a Google Drive extension...

This example uses the Google Drive API.
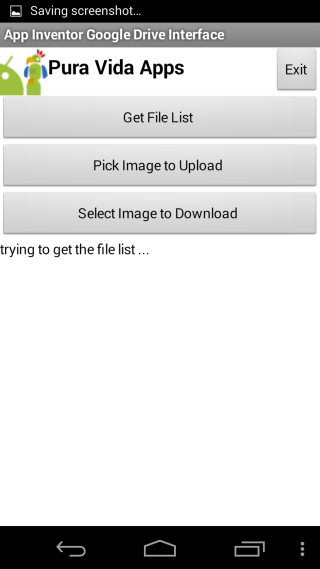
In this example the user can pick an image with the image picker and upload it to my Google Drive without need to login.
My Google Drive will be used as some kind of public file storage for everybody who uses this example.
Also the user can get a file list of the 10 last uploaded images and download one of them.
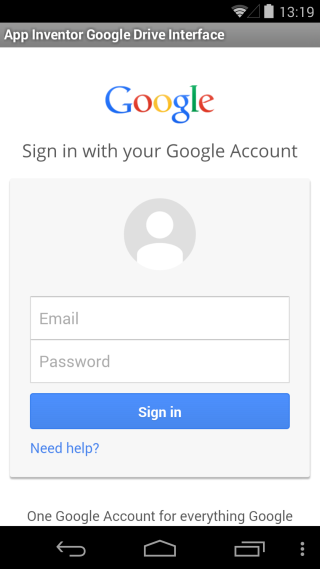
Alternatively of course you can use this example to access your own Google Drive instead of mine. In this case, authorization with
your Google account is required on first start of the app
(similar to the App Inventor - Fusiontable interface.)
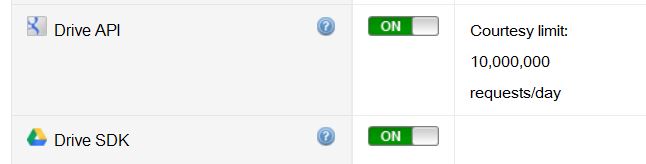
For your own app, first register your application as described here,
to be able to use OAuth to access Google APIs. In "APIs", just enable the Drive API and Drive SDK instead.
Then use these blocks for the further basic steps of the OAuth process.

In the authorization process, I'm currently using the following scope: https://www.googleapis.com/auth/drive.file.
See a list of available scopes here.


To use the example without login, then follow these steps

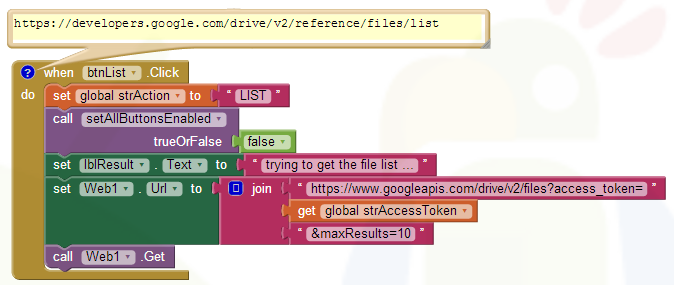
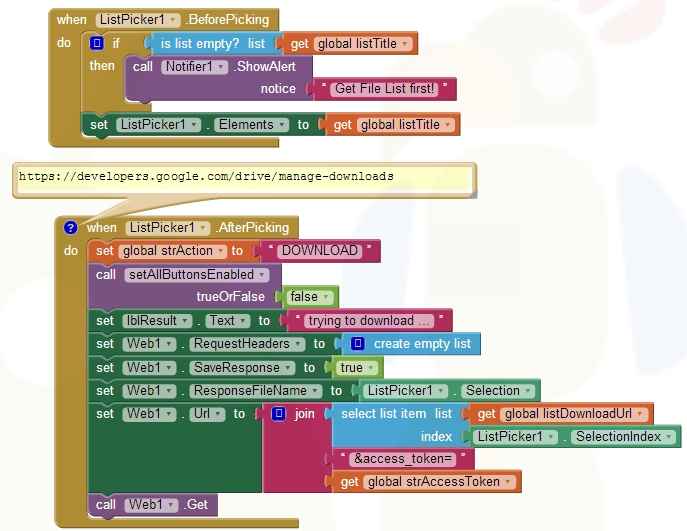
Lists the user's files.
I restricted the files list with the maxResult parameter to get only the last 10 images uploaded.

Insert a new file,
see also Upload Files.
App Inventor does not offer multipart uploads, which means we have to use a 2 step method to change metadata information (e.g. file name)
of the file to be uploaded: The first step is to do a simple upload into the root directory of Google Drive, the second step
is to update the metadata.
In the example I just update the file name, but it also would be possible to move the file into a public folder,
only the parent properties need to be adjusted accordingly.
The download URL then could be used to access the uploaded file without authorization.


Download a file using the download URL.
In the example the images are stored in the root folder of Google Drive,
which means, to download a file which has been uploaded by App Inventor, an authorized GET request is necessary.
As already mentioned, you also can move the uploaded file into a public folder to be able to access it without authorization.


The Google Drive API offers lots of possibilities. I did not take a look into modifying permissions, but this should also be possible from within App Inventor.
Tested successfully on HTC Desire running Android 2.2, Samsung Galaxy Tab 10.1N running Android 3.2 and Nexus 5 running Android 4.2.2.
In case you are interested, I also can offer a Google Drive - Fusiontable example: Take a picture or pick an image, upload it into a public folder into your Google Drive and store a public link to the image in a fusiontable.
Q1: Can I use the example also in a "one screen only" app?
A: Yes, just make sure to refresh the access token using the refresh token before uploading the file to Google Drive.
You can copy the relevant blocks from Screen1 of the example project.
Q2: Can I change the file upload and download format of jpg to doc or pdf?
Sure, just modify the example to your needs: before uploading your file, set the correct Content-Type, see also
here.

Also in procedure updateTitle set the new filename accordingly.

Q3: How can I create a folder?
A: After looking into the documentation:
"In the Drive API, a folder is essentially a file - one identified by the special folder MIME type application/vnd.google-apps.folder.
You can create a new folder by inserting a file with this MIME type and a folder title. Do not include an extension when setting a folder title."
I think, we can't create folders using App Inventor, because the current solution has 2 steps, which is required, because App Inventor does not offer multipart upload.
Changing the metadata of an uploaded dummy file into a folder most probably is not possible.
Site Content © 2010 - 2025 Pura Vida Apps using the
![]() Foundation Framework.
Foundation Framework.