Note:
 Please see this solution by @Anke. Thank you Anke.
Note: According to Mr. Pratim, the process ddescribed below is outdated. The package name now can be changed by:
Mr. Pratim described this process in detail here. Thank you!
See also this guide by Avram. Thank you!
See also https://developer.android.com/studio/publish/app-signing.html#considerations:
If you plan to support upgrades for an app, ensure that your key has a validity period that exceeds the expected lifespan of that app.
A validity period of 25 years or more is recommended. When your key's validity period expires, users will no longer be able to seamlessly
upgrade to new versions of your app.
If you plan to publish your apps on Google Play, the key you use to sign those APKs must have a validity period ending after 22 October 2033.
Google Play enforces this requirement to ensure that users can seamlessly upgrade apps when new versions are available
Thank you Boban!
Also, I had to zipalign the apk after signing it. Without zipalign the apk is rejected by the Play Store.
Thank you Martyn_HK!
I tried the steps of Mr. Patim in your page, and it did not work. That was because I had the latest java v.9 and it seems it is not compatible with my apktools v2.2.1.
The solution was to install JDK v7 and execute these lines in the cmd.exe before beginning with the process:
        java -version
        set JAVA_HOME=C:\Program Files\jdk1.7.0_79
        set PATH=C:\Program Files\Java\jdk1.7.0_79\bin;%PATH%
        java -version
You should find that the first line will give you version 8 or 9, the last line should give you v7
Once you close cmd.exe the process should be repeated if you open cmd.exe again. This seems does not change the environment variables of Windows.
It is only temporary for your cmd session (which is good, to not interfere with other programs that needs JDK9).
If you download the latest apktools (v2.3.1), then it will work with no problem with the latest JDK (v9).
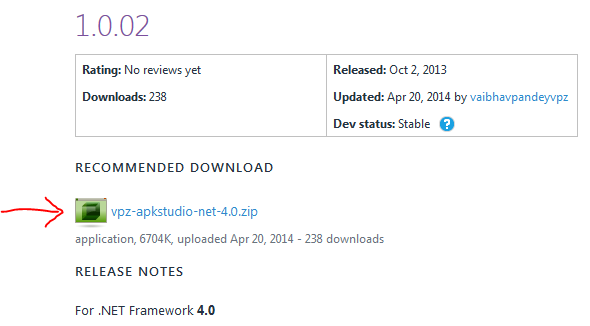
apktools can be downloaded from here..
Thank you Haider!
This tutorial is based on the work of Glassy. Thank you Glassy for the description and thank you DIYicious, for being the sponsor of this tutorial.
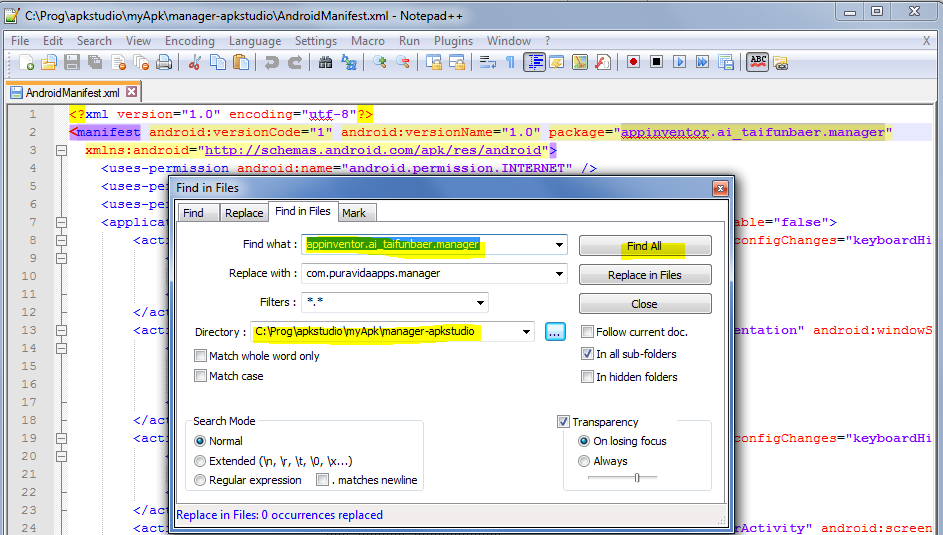
In the example I'm renaming the package name appinventor.ai_taifunbaer.manager to com.puravidaapps.manager.
See also the package name conventions here. Which means, we also have to adjust the directory structure
from appinventor/ai_taifunbaer/manager to com/puravidaapps/manager.


We have to adjust the directory structure from appinventor/ai_taifunbaer/manager to com/puravidaapps/manager.


We have to rename the package name from appinventor.ai_taifunbaer.manager to com.puravidaapps.manager in all files.


We have to rename the directory structure from appinventor/ai_taifunbaer/manager to com/puravidaapps/manager in all files.


Q1: I need help with a package app to rename... I cannot do! I've tried many times and I just can install the app. When I launch the app, it crashes! Can you help me?
A: You have to follow the tutorial EXACTLY step by step, else it will not work.
Q2: When I try to upload the modified apk to Play Store it gives me the following error "Upload failed
You uploaded an APK that is signed with a restricted certificate. You need to upload an APK signed with your own certificate."
A: After reading this
probably the easiest way is to use AppToMarket to sign your app or sign the app using this tutorial.
Q3: Your tutorial in changing the package name is awesome and working most of the time.
But when I try to add a "Texting" element from the Social Component in my app, I can't decompile it using APK Studio.
A: Brown Bear found out, how to decompile an app, which uses the texting component. Thank you Brown Bear!
Q4: I wait 8 hours for decompile the APK with APKstudio... and he has not finished... why?
A: As vgn found out the hard way here, installing Apk Studio in C:\Programs did not work to decompile an apk file. It worked for him after installing to desktop. Or just follow
my instructions above and install it in C:\Prog\apkstudio ;-)
Also probably one of the App Inventor components you are using in your project prevent Apk Studio to decompile the apk file. For example the texting
component (see solution in Q3 above) or the fusiontable control component, as Sharooz found out
here.
Generally to find out, which component prevents Apk Studio to decompile your apk file, first create a backup of your project
and download it to your computer. Then as test remove one of the components from the project, build it, then try to decompile again.
In case it still does not decompile, try to remove the next component etc. until you find out, which component it is. Let us know, what you find out.
Developing and maintaining snippets, tutorials and extensions for App Inventor takes a lot of time.
I hope it saved some of your time. If yes, then you might consider to donate a small amount!
or donate some mBTC to  Address:
1Jd8kXLHu2Vkuhi15TWHiQm4uE9AGPYxi8

Thank you! Taifun

This work by Pura Vida Apps
is licensed under a Creative Commons Attribution-ShareAlike 3.0 Unported License
with attribution (name=Pura Vida Apps and link to the source site) required.
Site Content © 2010 - 2025 Pura Vida Apps using the
![]() Foundation Framework.
Foundation Framework.